Managing the ED Findings Worklist
The ED Findings Worklist provides a view of all exams which have an ED Findings entry stored.
To access the ED Findings Worklist from the SynComm Landing Page, the user must have the following ED Findings privilege: 'The user can access the Emergency Dept. Findings Worklist'.
The ability to create, respond to, or acknowledge entries on the worklist depends on the other ED Findings privileges (for more information, see ED Findings User Privileges).

- Refresh Worklist: Forces a refresh of the ED Findings Worklist. However, "Administrator"-type users may configure the worklist to auto-refresh by setting the Refresh Time interval (e.g., every minute, every 3 minutes, etc.).
For information about this refresh setting, see ED Findings Configuration.
Note: Select the Filter button to engage the Filter selection window. After selections have been made, click anywhere on the page outside of the Filters to close the Filter selection window. Filter changes are displayed after the Apply button has been selected.
- Sites: A list of sites available for the logged in user. The sites available to a user are managed by privileged users. (For information about configuring Worklist Sites, see User Privileges.) Users can select individual sites or all available sites.
- Finding By: A list of users who have created findings. Users can select individual users or all available users.
- Response By: A list of users who have created responses. Users can select individual users or all available users.
- Finding Status: Entry status options.
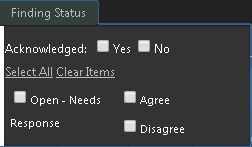
The Findings Statuses are designed to be a two piece filter, including a choice for whether the entries have been acknowledged or not and whether there was an agreement or disagreement, or if a Radiologist response is still needed. Finding statuses are as follows:
- Acknowledged = Yes: Exams with an ED acknowledgment stored, regardless of Agree or Disagree. These are closed entries.
- Acknowledged = No: Exams needing an acknowledgment stored. These entries require action by an ED user.
- Open - Needs Response: Exams needing a Radiologist response for a stored ED Finding. These entries require action by a Radiologist.
- Agree: Exams where a Radiologist response was an "Agree" value
- Disagree: Rxams where a Radiologist response was a "Disagree" value
For example, to display all entries where the Radiologist response was a disagree and the entry needs an acknowledgment from the emergency department staff, set the filter to:
- Acknowledged = No
- Select only the Disagree option
After Filter options have been selected, use one of the following:
- Apply: Updates the worklist to apply the current filter selections.
- Clear Filters: Resets all filter options to "All".
- Save Filters: Saves the current filter settings to the user's login. The saved filter settings become the user's default settings for the worklist. Whether the user navigates to a different page within the system or logs out, the next time the user accesses the worklist the saved filter settings will be retained.
Actions available from the ED Findings Worklist
Select the  icon to launch images from the ED Findings Worklist. The images are launched into the native Synapse PACS viewer.
Select the hyperlink in the Proc Description column to open the Report![]()
 window.
Select the  icon in the Follow column. When a patient is currently being followed by the logged in user, a checkmark icon
  is displayed in the Follow column.
The user must have the following privileges:
- Can create a response to an Emergency Dept. Finding
- The user can access the Emergency Dept. Findings Worklist
The study status must be Sent or Complete.
- Locate the finding and click the Respond link in the Action column.
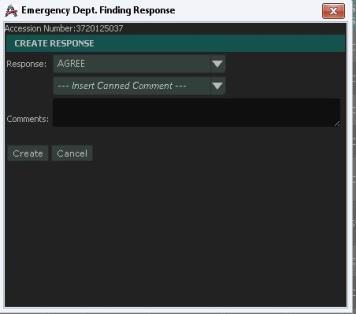
- Select the response.
- Select a canned response, which can be modified, or type the comment if needed (maximum 255 characters).
- Click Create.
The user must have the following privileges:
- Can acknowledge a response to an Emergency Dept. Finding
- The user can access the Emergency Dept. Findings Worklist
- Locate the finding and click the Acknowledge link in the Action column.
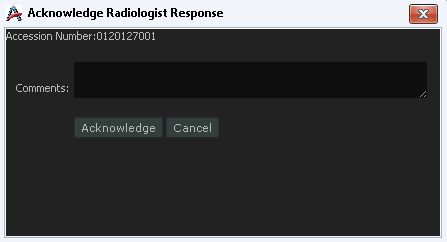
- Type the comment.
- Click Acknowledge.