Managing the Task Worklist
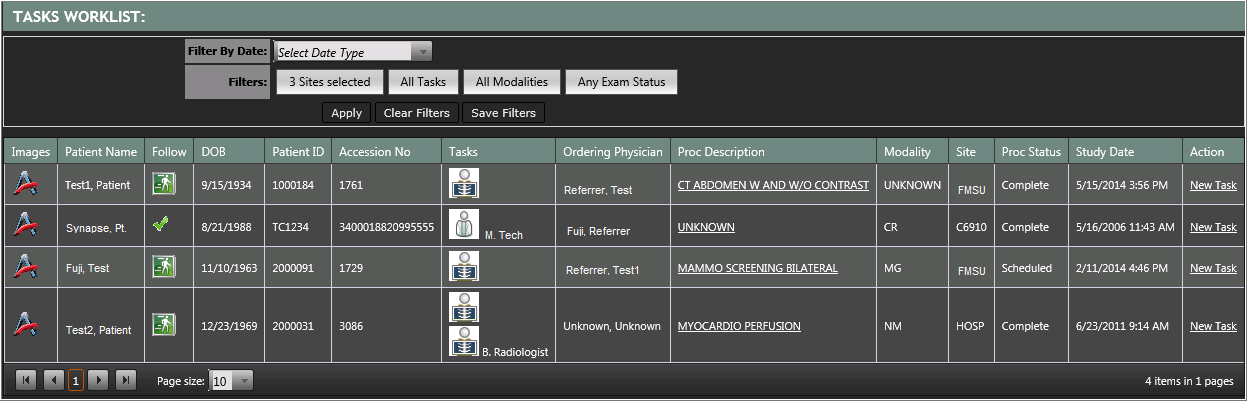
The Task Worklist displays all studies with an open task based on filterable criteria. From this worklist, tasks may be completed, edited, or new tasks added to existing entries.
Actions found in the collapseable left ide bar include:
- Refresh Worklist: Selecting this link will force a refresh of the Task Worklist. However, Administrators may configure the worklist to auto-refresh, set to the increment they choose. (ie: every minute, every 3 minutes, etc.)
- Show Admin Report: If the user has privileges to view the Task Report, selecting this link will route the user to the Task Report.
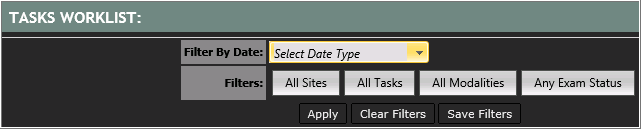
Filter options include:
- Filter By Date: Allows users to filter the worklist based on the Task Created Date or the Task Due Date. Once a filter option is selected, two date fields are displayed to the right of the field to indicate the From and To dates.
- Sites: The Site options displayed are managed by system Administrators at the User Privilege table. (click here for more info on how to configure). Users may choose to select/unselect sites to display within the worklist.
- Tasks: All Task types are available for selection. Users may select/unselect Tasks to display within the worklist.
- Modalities: Displays a list of modalities. Users may select/unselect modalities to display within the worklist.
- Exam Status: Displays a list of exam status options. Users may select/unselect exam statuses to display within the worklist.
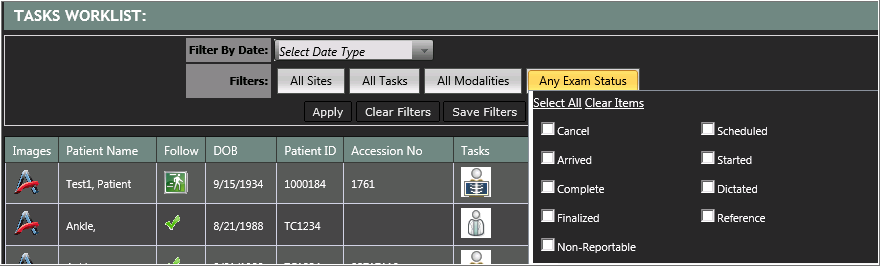
Note: Select the Filter button to engage the Filter selection window. After selections have been made, click anywhere on the page outside of the Filters to close the Filter selection window. Filter changes are displayed after the Apply button has been selected.
Once a user has selected the filter options, there are 3 options:
- Apply: Updates the worklist to apply the current filter selections.
- Clear Filters: Resets all filter options to "All".
- Save Filters: Saves the current filter settings to the user's login. The saved filter settings become the user's default settings for the worklist. Whether the user navigates to a different page within the system or logs out, the next time the user accesses the worklist the saved filter settings will be retained.
Images may be launched from the Task Worklist by selecting the icon. The images will be launched into the native Synapse PACS viewer.
Patients may be added to the Pulse patient list by selecting icon in the Follow column. When a patient is currently being followed by the logged in user, a checkmark icon
 will be displayed in the Follow column.
The PowerJacket report tab may be launched from the Task Worklist by selecting the Proc Description hyperlink.
Selecting the task icon from the worklist will display the task window:
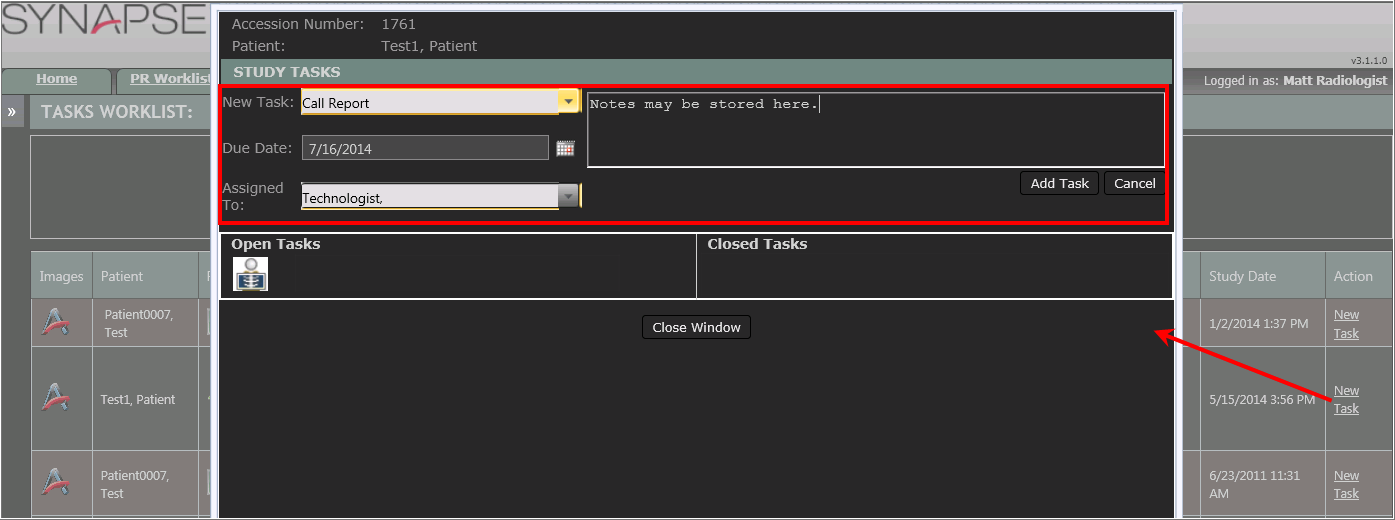
Creating a Task
If a new task needs to be manually entered for a study already on the Task worklist, locate the study and follow the steps below. If a task needs to be created for a study not currently on the Task Worklist, review the steps on how to add a task from the PowerJacket here.
- On the Task Worklist, select the New Task link, found in the Action column. (A new window will open)
- Make a selection from the New Task drop down list.
- Optional: Select a Due Date and/or an Assigned To value.
- Optional: Enter text into the Note field. (maximum 255 characters).
- Click Add Task. The task icon is added to the Open Tasks section.
- Click Close Window.
Result: The New Task window closes and the Task Worklist refreshes to display the new task entry. Hovering over the task icon will display the details and duration since the task was initially added to the study.
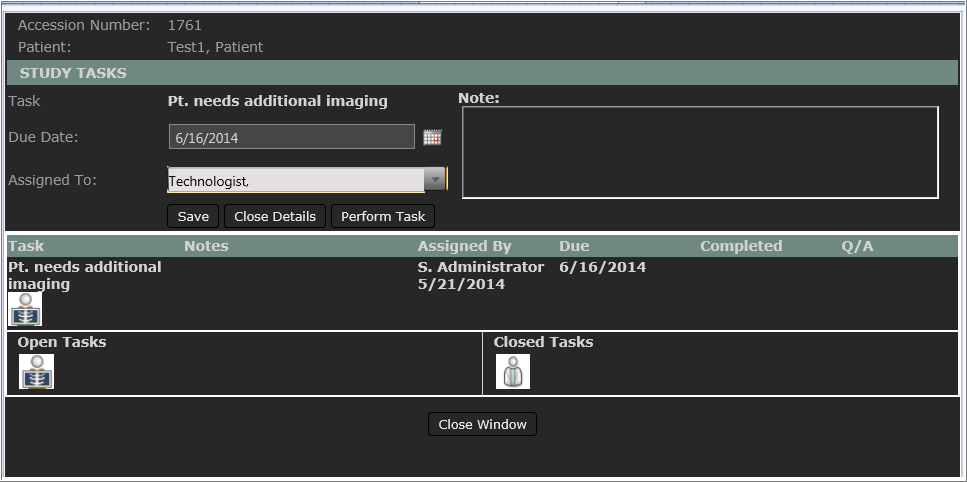
Reviewing & Editing a Task
Task details may be reviewed by either hovering over the task icon on the Task Worklist, or by selecting the task to engage the task window. Follow the instructions below to engage the task window for review and edits.
- On the Task Worklist, locate the task for review/edit.
- Click on the task icon to engage the Task window. The details will be loaded into the section above the Open Tasks section.
- Review the details and add/edit any of the optional fields:
- Due Date
- Assigned To
- Notes
- Click Save to store the changes.
- Click Close Details to close the details section.
Note: If this is selected prior to the Save button being selected, changes will not be stored.
Result: The task details are updated if Save was applied. Hovering over the task icon will display the updated details and duration since the task was initially added to the study.
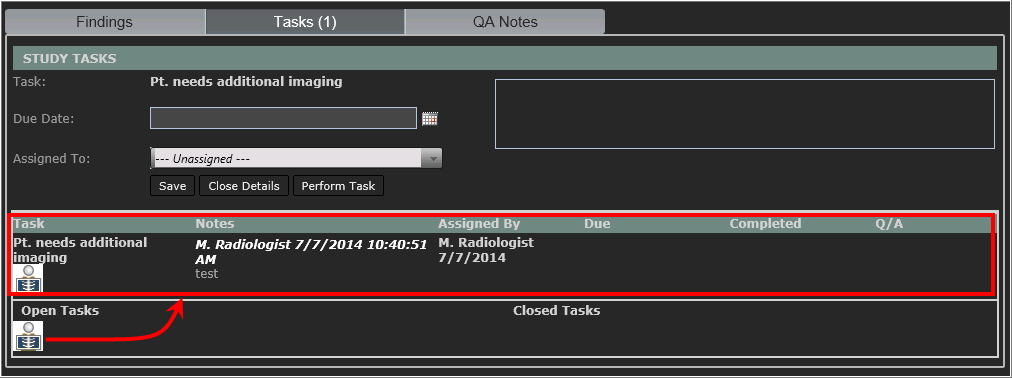
Performing a Task
- On the Task Worklist, locate the Task to be completed.
- Click on the icon to open the task details window. (The task details will be pre-loaded)
- Review the details and add notes, if applicable.
- Click Perform Task, which will save any notes as well as auto-close the task details section.
- Depending on the configuration of the task, one of the following actions may occur:
- None: no additional action would occur.
- Task Q/A: customized Task Questions would be displayed to the user to respond.
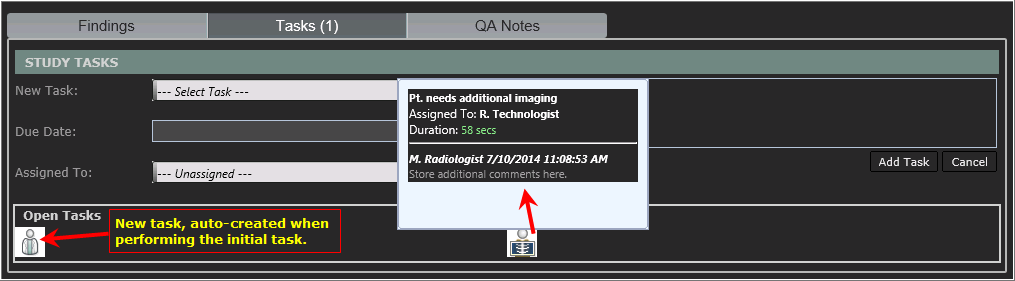
- Launch Task: an additional task may be auto-generated. The new task will set the date/time and "Assigned By" as the user who performed the original task .
- Custom URL: a custom URL string may be auto-engaged after a task is marked completed.
Result: The task details are updated and the task is removed from the Task Worklist. Reviewing the study in the PACS PowerJacket will display the task in the Closed Tasks section. Hovering over the task icon will display the updated details and duration from the time the task was initially added to the study until the time the task was closed.
Image: Closed Task with details & New task auto created.